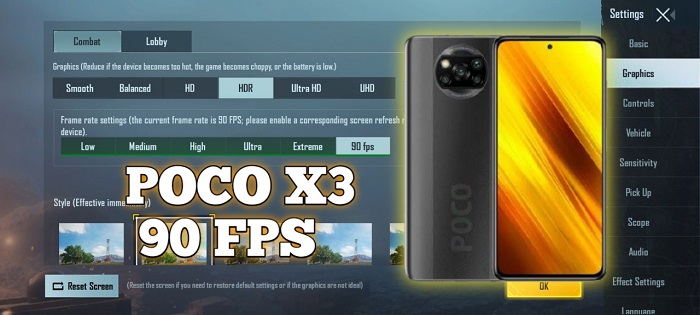
Enable Framerate 90 FPS in PUBG Mobile on Poco X3 NFC (Surya/Karna) it’s possible? Yepp, you can play 90 FPS on POCO X3 with this tutorial. You can follow this way without ROOT on your phone or UBL, I’ll explain it below.
As you know, POCO X3 NFC is coming with a 120Hz of screen refresh rate, and the PUBG Mobile now supports a 90 FPS frame rate in the game. The problem coming when you entering the game, with Poco X3, actually you will get an “Ultra” framerate on the “Smooth” graphic setting for maximum settings. There is no setting for “Extreme” framerate or 90 FPS.
Why is happen? maybe his phone using a new chipset Qualcomm Snapdragon 732G, so the PUBG Mobile will take more time to improve game performance with this new chipset. But how it possible to unlock the 90 FPS settings?
Although you can unlock the setting to display a choice of 90 FPS, MIUI itself uses a dynamic refresh rate system that will automatically lower its frame rate to 60 FPS when you open a game even if you have set the screen refresh rate to 120Hz.
I got your problem 🙂 At this time I’ll give you steps to disable that dynamic refresh rate, so you’ll able to play on 90 FPS in PUBG Mobile.
How to Play 90 FPS in PUBGM on POCO X3 NFC / X3 PRO
Let’s do this guy, First, you need to disable that dynamic refresh rate screen, You need the refresh rate to be fixed in 90Hz or 120Hz, this will save more your battery drain also.
How to Disable Dynamic Refresh Rate on POCO X3?
- Go to “Settings“
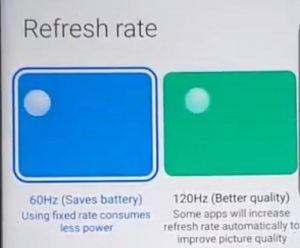
- First, set your refresh rate to 60HZ
- Then back to the Settings again, go to “Apps” / “Manage Apps” /
- Then search for “Battery and Performance“, hit on it
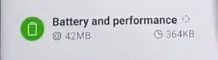
- Look at the bottom right, hit “Clear Data“
![]()
- And choose “Clear All Data“
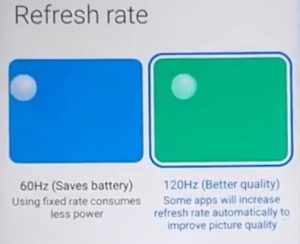
- Back to the Settings again and set your refresh rate to 120HZ
- Done
After this, you’ve disabled the dynamic refresh rate and you now can use it for gaming. Please follow the tutorial below to unlock the 90 FPS frame rate settings in PUBG Mobile.
How to Unlock 90 FPS Setting in PUBG Mobile on POCO X3?
After you guys did the steps above, now it’s time to unlocking the 90FPS setting in PUBG Mobile, I’ve posted this tutorial actually in this article: How to Unlock All Graphics on PUBGM, You can read it instead or read the tutorial below 🙂
- Download this 90 FPS Active.sav File
- Open and extract it
- Then Copy or Cut the “Active.sav” to:
PUBG Mobile Global: Copy or Cut to “Android / data / com.tencent.ig / files / UE4GAME / ShadowTrackerExtra / ShadowTrackerExtra / Saved / SaveGames / Paste and Replace Here”
PUBG Mobile Krjp: Copy or Cut to “Android / data / com.pubg.krmobile / files / UE4GAME / ShadowTrackerExtra / ShadowTrackerExtra / Saved / SaveGames / Paste and Replace Here”
PUBG Mobile Vietnam: Copy or Cut to “Android / data / com.vng.pubgmobile / files / UE4GAME / ShadowTrackerExtra / ShadowTrackerExtra / Saved / SaveGames / Paste and Replace Here”
PUBG Mobile Taiwan: Copy or Cut to “Android / data / com.rekoo.pubgm / files / UE4GAME / ShadowTrackerExtra / ShadowTrackerExtra / Saved / SaveGames / Paste and Replace Here”
If it doesn’t work, you need to “force stop” the PUBG Mobile before moving the activesav file then reboot your devices after moving the file.
Now try to enjoy it, After you did all of the tutorials above, it should be worked. And now you can play PUBG Mobile in 90 FPS with your POCO X3 NFC without UBL or ROOT.
If you have a problem belong to this tutorial, please drop your comment below, I’ll help you as fast as possible, See ya next time!
Neko
Dónde está la configuración para descargar?
Link download is already in the post.
Thank you.
Sir, i have a poco X2 and currently using a active.sav file for 60 fps. I tried using your other 90 fps config file on top of the activ.sav file but it didn’t work what do i do? Do i need to remove the activ.sav config file first?
Hi, make sure to place the config file above in ShadowTrackerExtra / ShadowTrackerExtra / Config / “Paste Here”.
NOT IN ShadowTrackerExtra / ShadowTrackerExtra / Saved /…..
And follow the tutorial above to enable static refresh rate.
Delete game and again install
The config link doesnt work.. how can i have ir?
Hi, I’ve tried it and work.
Thank you.
Will i get banned for this method bro?
I’m using this config and my account it’s safe.
I activate but gyroscope will be off?
No
Bro after doing that I have 90 fps but my gyroscope is gone ????!!!? Why
Have you tried to reboot your phone?
I’m gonna try ?
Bro thanks ?❤️❤️❤️❤️☺️ your the best ..
I was walking like like a bot ?
I update pubg today but 90 fps turn off, why?
Active.sav is worked.
What is that?
https://nyaatech.net/activesav-90-fps/
Its not worked more after pubg update..
Please give the news info to unlock 90FPS for POCO X3
I want to ask, I have a poco x3 pro, I did it according to the instructions, but it doesn’t work, and if it would work, please give me a tutorial, thank you.
Hey after clearing data of Battery and Performance app I’m getting 120hz in every app ..but how to go back to normal case….
It’s look like you need to factory reset to bring back the dynamic refresh rate. I’ll suggest you to change the RR to 90Hz.
Here’s the steps.
-Download “SetEdit” on PlayStore
-Choose “System table”
-Find “user_refresh_rate”
-Edit value and put “90”
-Save changes
This’s more more better than dynamic 120Hz.
Thank you.
Hello sir, I am playing wingo game but screen fleking. What is this solution
Hi, try to set the screen to 60Hz when playing that game.
It’s not working bro pls help me
Mera to jaisa hai waisa hi hai saara Setting sahi se kiya fir v nhi ho tha hai bhai
I am getting too much lag after this.
Set to extreme!
I can’t extra the file in my phone i have poco x3.
Hello ,
Is there a way to make it run 90 fps (pocox3 ) cause since this update , the lag is so much worst bro , please reply to me ✌️
The titan strike event is give us much lag now.
I can’t extract the files
Hi, you can extract it with 3rd app such as “Zarchiever or RAR, or something else…
Ia that still working?
Yes
Ca endommage pas l’appareil ?
Non, c’est sûr!
Me perdi quando chegou em Paste and Replace Here sendo que tinha mais pastas
to play 90 fps i used to come here to download but when i update my device hep to android 11 miui 12.0. 1 can’t play 90fps with the same method only 60fps please help me unlock it
It happens with my poco x3 pro sir even after i upload the 90fps file it still shows fps meter with 60fps how to fix it
everytime before i start the game, i need to do all the steps ?
No, just once
wow!!! It woks… It doesn’t show to select 90fps option under graphics settings, but fps meter shows 90fps – 91fps when playing. Thank u so much..!
Your welcome.
That’s how it works!
Can I unlock 120fps in Poco X3 Pro?
Hi, PUBG Mobile only supports 90 FPS for now, let’s wait until they added the 120 FPS feature.
A. Does it still work after 1.7 update?
B. Will my account get banned for this method?
THANKS BRO 🙂 Hope you will answer me 😉
Hi
A: it works for some devices
B: No, it’s pretty safe.
Thank you.
Hi, Neko.
Firstly, It’s amazing that you are into anime.
Now the problem, sometimes when I start the game it kinda messes my settings. No, I know this file is supposed to change some of them. But like sometimes when I am playing the leaning gets messed like it changes to tap to lean mode intstead of hold to lean that I changed to. Problem is even I change the settings 10 times it does not take effect. But next match it is ok. after some matches, it’s like that again. I appreciate your help and ,yes, this file really works. I just wanted to give some feedback so maybe you’ll update it in the future.
Hello, thank you for coming…
have you tried the latest one? Here’s https://nyaatech.net/unlock-all-graphics-pubgm-170/
Will This ban I’D….??
NO
How to make page download?
If want download in your website?
I want too
I’m stored the file in my server and used a plugin called “WP Safelink” for protecting the link.
Thank yoU!
After i did those steps It didn’t show any HDR OR 90FPS , but the game turbo app showen 90 and even higher FPS , were i doing it right ?
Pls ? how to do “force stop”
to pubg in Poco X3 pro
It changed my graphics to HDR but it’s gave me 90 fps i I changed back to Smooth graphics and it’s back to 60 fps 🙁
Sir i tried the method what written up but it only reset my audio/graphic and botton setting nothing else happened
Kindly enable FPS meter
Thank you.
60 fps
I don’t have the battery and performance section. how do i get it?
I have doing and well it doesnt work to NFC..? i Don’t know why ..i have done all the step could give some link..or YouTube so i can know my mistake
I want to ask, I have a poco x3 pro, I did it according to the instructions, but it doesn’t work, and if it would work, please give me a tutorial, thank you.